Well, starting with new tutorials! Unity3D and C# development.
Today we learn an intelligent way to animate a character based on the input Axis(Horizontal / Vertical) starting from a single image, called “sprite“.
Sprite?
In computer graphics, a sprite is a two-dimensional bitmap that is integrated into a larger scene.
Originally sprites referred to independent objects that are composited together, by hardware, with other elements such as a background. This occurs as each scan lineis prepared for the video output device, such as a CRT, without involvement of the main CPU and without the need for a full-screen frame buffer.[1] Sprites can be positioned or altered by setting attributes used during the hardware composition process. Examples of systems with hardware sprites include the Atari 8-bit family, Commodore 64, Nintendo Entertainment System, Sega Genesis, and many coin-operated arcade machines of the 1980s.
Use of the term “sprite” has expanded to refer to any two-dimensional bitmap used as part of a graphics display, even if drawn into a frame buffer (by either software or a GPU) instead of being composited on-the-fly at display time.
Ref: https://en.wikipedia.org/wiki/Sprite_(computer_graphics)
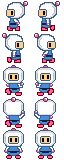
Desidered output
![]()
A character that change animation if changes axis
Setup project
Search on google and take a sprite image that you like and open Unity to make a new 2D project.
Drag your sprite in project, Assets folder, select it and set these parameters.

- Texture Type should be Sprite, of course
- Sprite Mode should be “Multiple” because we need to slice this image in others smallest
- Pixel Per Unit is the image size
- Remove Generate Mip Maps and set Filter Mode to Point
Edit sprite
Select the sprite after the parameters adjustment and click “Sprite Editor“. It’s a Unity tool to slice the sprites!

In Slice menu, adjust some settings and press “Slice“. A grid should appear. When it’s ok, don’t forget to Apply edits.
Take a look to the sprite asset now, you should see the chunks created.

Next, to create animations, select “two chunks for time” and drag it to scene screen. Choose a name for the animation that you’ve created, like “animationRight” or “animationUp“, etc…
You should see something like that (if Play is pressed…):
![]()
Well done!
Finalizing:
- remove all bomberman_* object from Hierarchy and from the Assets folder. Retain only the bomberman_0 and if you want rename it to bomberMan.
- drag the bomberMan object from Hierarchy to Assets. This create a prefab object. (Useful if you had to create copy of your player with all params and scripts inside). Name it bomberPrefab and remove from the Hierarchy panel.
- select the bomberPrefab created, click to Add Component and select “RigidBody 2D“. Configure only “Gravity scale“, to 0, or better, use no gravity.
Now, double click on the only one animation that you have in the Assets. Should be bomberman_0 (mine is bomberAnimationCtrl). A new “Animator” panel is opened.
Drag all the animations created on it and connect to the “Any State” block (right click -> Make transition):

If you want to change animation speed for each state, select the desidered block and change the Speed editing the Speed field.
Perfect, we need to add some animator parameters (X and Y). To do this, select the “Parameters” tab and add two INTs, named X and Y with default value = 0.
Now, select first arrow (from Any State to bomberIdle) and in the Inspector, at bottom, use the “+” to add a new Condition:

Do the same for all arrows with this logic:
- Idle -> X == 0 && Y == 0
- Down -> Y > 0
- Up -> Y < 0
- Left -> X < 0
- Right -> X > 0
For all arrow, deselect the “Can Transition To Self” check.
More info here -> https://docs.unity3d.com/Manual/class-Transition.html
Moving player
Of course to see that the animation works successfully, we need to move the BomberMan!
In the Asset folder, rigth click -> Create -> C# Script. Name it Movements and double click to open,
In the meantime, copy paste this code:
[csharp autolinks=”false” collapse=”false” firstline=”1″ gutter=”true” htmlscript=”false” light=”false” padlinenumbers=”false” smarttabs=”true” tabsize=”4″ toolbar=”false”]
using UnityEngine;
using System.Collections;
public class Movements : MonoBehaviour
{
public float speed = 6;
void FixedUpdate ()
{
float h = Input.GetAxisRaw (“Horizontal”);
float v = Input.GetAxisRaw (“Vertical”);
GetComponent ().velocity = new Vector2 (h, v) * speed;
GetComponent ().SetInteger (“X”, (int)h);
GetComponent ().SetInteger (“Y”, (int)v);
}
}
[/csharp]
What does it do?
We declare a public variable named speed. Public is used (in Unity of course…) to edit its value from editor.

FixedUpdate is a method that Unity call every frame and we get the Horizontaland Vertical position values changing the “velocity” of our player.
Reference: https://docs.unity3d.com/ScriptReference/MonoBehaviour.FixedUpdate.html
Player responds to keyboard arrows movements.
To change the animation, we change the value of the X and Y animation controller variables.
Save, close and go back to Unity.
Desidered output:
- Select your prefab (bomberPrefab) and drag the Movement script on it. A new section appear (with speed params).
- Drag your prefab on the scene
- Select “Main camera” -> “Clear Flags” -> “Solid color” and change the color (if you want…)
- RUN and move your player!